Good photography – so the saying goes – takes time. But what if you’re on a road trip through Scotland, driving from place to place? Then time is scarce. Here’s how to get great Scotland photos anyway – whether with a big camera or a smartphone.
Contents
“Pull over a second, love!” – I’ve spotted another subject by the roadside. My wife Katrin steers over on the single-track road and stops the car. I jump out and start shooting. Five minutes later, it’s over, since I don’t want to push Katrin’s patience too far. And we’re off again.
This scene is fairly typical whenever we’re on one of our road trips through Scotland. Just as typical is my annoyance when I get home and see what other photographers managed to capture from the very same subject: mine looks standard, theirs has real atmosphere.
To get better results even under time pressure, I’ve put together a mix of gear and techniques that lets me shoot quickly and beautifully in Scotland. And please: if you have further tips, do let me know in the comments.
My gear: light, fast, stable
Naturally, any professional photographer will tell you it’s best to bring three or four different lenses and a heavy tripod – for stability.
And they’re right – if you actually have the time. But that’s exactly what I don’t have, so I have to compromise. My current Scotland photography kit looks like this:
- Canon EOS R5 Mark II as my main camera
- first-generation Canon EOS R5 as a backup
- lenses depending on the subject and trip
- a sturdy travel tripod for photos
- a RØDE Wireless GO with windshield and magnetic clip for video
- camera backpack, laptop and an extra backup drive
Advertising disclosure: links marked with * are affiliate links. If you buy something through them, I receive a commission. The price doesn’t change for you. As an Amazon Associate, I earn from qualifying purchases.
Main camera and backup
My main camera these days is the Canon EOS R5 Mark II*. It delivers high resolution, fast autofocus, and plenty of headroom in poor light. That’s certainly professional equipment, and not a requirement for beautiful holiday photos. But when landscape, wildlife and video all come together, I want to be able to rely on my camera.

I also bring along a first-generation Canon EOS R5* as a backup. That might sound excessive at first. But I’ve had a camera fail on me during a Scotland trip before. When the images are part of the job, I don’t want to suddenly be left without a camera because of a fault. For most travellers, of course, a smartphone is a perfectly fine backup.
Lenses for landscape and wildlife
Which lenses I bring depends on the particular trip. For landscape photography in Scotland, a wide angle is handy, a general-purpose zoom saves you from constantly swapping lenses on the go, and for wildlife I need reach. In Scotland, that means deer, eagles and seals, for example.
Opportunities tend to come up quite spontaneously, like the time on the Bealach na Bà behind Applecross, when we watched a rutting stag close to the road for several minutes. A telephoto lens is worth its weight in gold at moments like that. Even so, I try to take only what I’ll realistically need on any given day.
A sturdy travel tripod
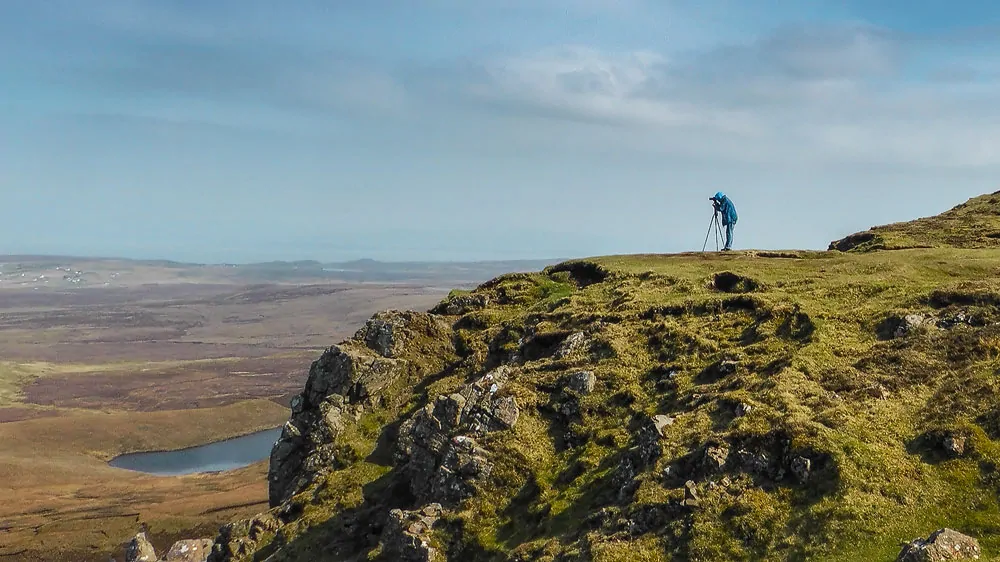
A good travel tripod still matters a great deal to me. It should be light and quick to set up, yet carry a heavy full-frame camera safely. Folded down, it needs to fit in my travel luggage. A quick-release plate anchors the camera securely, but frees it again with a single motion.
A model that fits these requirements well is the Manfrotto Befree GT XPRO Carbon*. It weighs around 1.76 kilograms, folds down to about 43 centimetres, and, according to the manufacturer, can support loads of up to 12 kilograms. So it’s not exactly ultralight. But with an R5 and lens on top, I’d rather have that stability than shave off the last few grams.
I use the tripod mainly for long exposures, dusk shots and carefully composed landscape images. In windy conditions, I only extend the legs as far as necessary and keep the centre column as low as possible. My videos, on the other hand, I always shoot handheld.
My camera backpack is small, light and, above all, reasonably waterproof. That way I can carry it in the rain, or set it down on the ground. I usually pack a small plastic bag inside it too, which I use to kneel on.
It’s also important that the camera backpack meets hand-luggage size limits. I mainly bring the laptop to back up the day’s photos each evening. I also keep an additional backup on a second storage device.
Smartphone: often the best camera for the road
You don’t need to travel to Scotland with a professional camera. Current smartphones take surprisingly good photos in good light. They’re always to hand, weigh almost nothing, and are ideal for spontaneous travel shots, landscapes and short videos.
A few simple things help: clean the lens before shooting, switch on the grid, and keep the horizon level. Where possible, I use the phone’s built-in focal lengths rather than digital zoom. Tapping on the main subject usually sets focus and exposure precisely where you want them.
Limitations show up with distant wildlife, moving subjects, low light and heavy cropping afterwards. A mirrorless camera gives me more control here. For many travellers, though, the smartphone isn’t a fallback – it’s genuinely the most sensible camera to bring, and it doubles as a useful backup if the main camera fails.
Video and sound: handheld, but never without a windshield
I shoot video handheld. It keeps me mobile and lets me react quickly to a scene. Instead of a heavy camera rig, I rely on the camera’s image stabilisation, a steady stance, controlled movements and fairly short shots. Where it makes sense, I’ll also brace myself against a wall or a railing.
For audio, I use the current generation of the RØDE Wireless GO*. A windshield is practically essential in Scotland. A magnetic clip* lets you attach the transmitter to a jacket or clothing quickly, and fairly unobtrusively too.
Good sound is often underrated. Viewers will forgive a slightly shaky shot in a travel video far more readily than dialogue lost to the wind.
Extra accessories: my tip is a polarising filter
If I could only recommend one filter, it would be a polarising filter*. It does something even Lightroom can’t reliably fix afterwards: it lets you control reflections right at the moment of capture.
That’s not just useful with water. A polarising filter can reduce reflections on window panes, wet rock and damp vegetation too. Stones and structures beneath the surface of the water suddenly become visible. Especially in Scotland, where water and wet surfaces are found almost everywhere, this is, for me, an extremely effective filter.
That said, more isn’t always better. I turn the filter until the reflection suits the image. With very wide-angle shots, the sky can otherwise end up looking unevenly dark. The filter also cuts down on light. For that reason, it doesn’t stay on the lens permanently.
I also bring along an ND filter for artistic motion-blur effects on water, and a cleaning kit*.
Tips: small helpers on the road
I usually leave the travel tripod attached to the camera and lay the combination out flat on the back seat – carefully, of course. That way I only need to pull the tripod and camera out from behind me and set it up. I wrap the camera carefully in a jumper for protection.
In the evening, I don’t just back up my data on the laptop – I also clean the camera using the cleaning kit. In Scotland, I actually use disposable wipes for this, since if one gets wet or dirty, I can simply grab a new one. I then use the cleaning fluid at least on the front element of the lens.
Planning Scotland photo spots in advance
A quick word too on planning shots from home – once you already know which attractions and photo spots in Scotland you want to visit. For one thing, almost all of Scotland is very well covered by Google Street View. That lets you do a little virtual reconnaissance of a location beforehand, and sometimes even choose your position along the road in advance.

For another, you can also check lighting conditions in advance, using the Suncalc website. It tells you when and how the sun will strike a given point – at a particular time, on a particular date. Here’s an example for Eilean Donan Castle.
Incidentally: I never pack my saved photos into the regular checked luggage any more. Always keep your photos in your hand luggage on the way home. I’ve broken out in a cold sweat before, when our checked luggage – with all the photos in it – didn’t arrive, because the baggage belt had broken down in Frankfurt.
In Scotland, of course, rain can throw a spanner in the works. Droplets on the front lens element and sea spray can quickly turn into a milky haze. Still, you don’t need to pack the camera away the moment it starts raining: dark clouds, glistening rocks and shafts of light between showers can create a fantastic atmosphere. The key is to keep the front lens element dry, and to clean your gear thoroughly afterwards.
Checklist: what to keep in mind
In theory, I already know quite a lot about photography. The trouble is, in the rush of the moment, I often don’t call on that knowledge. This checklist is my attempt to change that.
The long version follows below. A short version can be downloaded and printed out.
Story: before you start, take a moment to pause and think: what story does this subject tell? Sad? Cheerful? Romantic? What history might it have? What do I, as the photographer, see in it?

Mood: what’s the weather dictating? How is it shaping today’s mood? Threatening clouds? Blazing sun? Blue sky? Can I emphasise and capture that? This also raises the question of how much sky belongs in the frame – just a sliver? A third? More?
Light: where is the sun? How can it be worked into the composition? Could it even become part of the image itself, through lens flare, or by shining through somewhere? Crucially: where does the subject cast its shadow, and how can I use the light to capture it with real depth and dimension?
Perspective: definitely start with a few safety shots, front-on and from the side – deliberately unimaginative. After that, try unusual angles – shooting from below looking up, say, if it’s an imposing castle.

Foreground: can the main subject carry the shot on its own? Or does it need something in the foreground to convey scale? With a beautiful loch in a glen, for instance, an element in the foreground – a rock or a flower – can really enrich the image. Just make sure it stands out clearly and that everything stays in focus.
Background: watch out! Does the background actually suit the shot? Is there anything unwanted lurking back there – a so-called photobomb? Could shifting your position let the background reinforce the mood instead? Does the subject perhaps blend in too much with its background? Should I choose an aperture that throws the background out of focus?
Composition: where do I place the subject within the frame? Keep the rule of thirds in mind – or deliberately break it. Also take a moment to check whether the horizon is level and whether anything at the edge of the frame is distracting.
Variations: alongside the landscape orientation, have I also taken a portrait-oriented shot? Is there a detail that deserves its own photo? For an important subject, I’d rather take several variations.
Technique: is the lens clean and dry? Is the focus locked on correctly? Is my shutter speed fast enough to shoot handheld? And do I also want a short video clip, or to capture the ambient sound?
As I said: this checklist is just a memory aid. And it’s probably not complete either. I’m always happy to take further suggestions and add to it.